ÇÖZÜLDÜ Error loading kernel cache sorunu

ghostrider07

APPRENTICE
8 Kas 2019
12
0
1
Merhaba Arkadaslar,

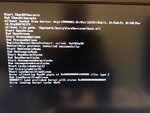
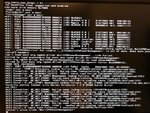
ekteki hata geliyor kurulum esnasinda

neden olabilir

sistem ozellikleri;

  • Üretici & Model: Toplama Kasa
  • Detaylı CPU modeli: Intel Core i5 2500K 3.3Ghz
  • Anakart:Asus P8Z68-V/gen3
  • Grafik Aygıtları: XFX HD7950 GDDR5 3GB
  • Ağ Aygıtları: Intel® 82579, 1 x Gigabit LAN Controller
  • Disk ve Ram: 120GB SSD & 1TB HDD & 16GB DDR3 1600MH
 

Ekli dosyalar

KaoS

MASTER YODA
MODERATOR
DENEYİMLİ ÜYE
1 Eki 2017
13,766
3,944
4,401
Ekte verdiğim efi dosyasını USB içerisindeki ile değiştirip deneme yap sonucu bildir.
 
BootLoader
Opencore 0.8.4
Laptop Modeli
Lenovo IdeaPad 300-15isk
Anakart Modeli
1- Asus TUF H310-Plus Gaming 2-Asus P8H61
İşlemci Modeli
1- i5 9400F 2- i5-2400
Grafik Kartı
1- RX 570VR 2- 9600GT
Ses Kartı Modeli
1- Realtek ALC887 2- Realtek ALC888B
Ağ Aygıtları
1- İntel L211 2- Realtek RTL8169
Disk ve RAM
1- 240 GB SSD & 1000 GB HDD & 16 GB DDR4 2- 240 GB SSD & 500 GB HDD & 16 GB DDR3

KaoS

MASTER YODA
MODERATOR
DENEYİMLİ ÜYE
1 Eki 2017
13,766
3,944
4,401
Clover ekranında
Options
Graphics options
İnjectATI işaretli
RadeonDeinit işaretli
Fakeİd 0x1245678
Girerek deneme yap olmaz ise aynı ayarlar ile EFI/Clover/Kexts/Other içerisinden NullCpuPowermanagament.kext silip deneme yap.
 
BootLoader
Opencore 0.8.4
Laptop Modeli
Lenovo IdeaPad 300-15isk
Anakart Modeli
1- Asus TUF H310-Plus Gaming 2-Asus P8H61
İşlemci Modeli
1- i5 9400F 2- i5-2400
Grafik Kartı
1- RX 570VR 2- 9600GT
Ses Kartı Modeli
1- Realtek ALC887 2- Realtek ALC888B
Ağ Aygıtları
1- İntel L211 2- Realtek RTL8169
Disk ve RAM
1- 240 GB SSD & 1000 GB HDD & 16 GB DDR4 2- 240 GB SSD & 500 GB HDD & 16 GB DDR3

KaoS

MASTER YODA
MODERATOR
DENEYİMLİ ÜYE
1 Eki 2017
13,766
3,944
4,401
Ek olarak cpus=1 komutunu kullanarak deneme yap
 
BootLoader
Opencore 0.8.4
Laptop Modeli
Lenovo IdeaPad 300-15isk
Anakart Modeli
1- Asus TUF H310-Plus Gaming 2-Asus P8H61
İşlemci Modeli
1- i5 9400F 2- i5-2400
Grafik Kartı
1- RX 570VR 2- 9600GT
Ses Kartı Modeli
1- Realtek ALC887 2- Realtek ALC888B
Ağ Aygıtları
1- İntel L211 2- Realtek RTL8169
Disk ve RAM
1- 240 GB SSD & 1000 GB HDD & 16 GB DDR4 2- 240 GB SSD & 500 GB HDD & 16 GB DDR3

montezuma

MASTER YODA
Yönetici
19 Eki 2016
29,833
7,598
4,401
Eğer yapmadıysa anakartının BIOS güncellemesini yap:
BIOS ayarlarını aşağıdaki gibi yap.
Kod:
AI Tweaker > Ai Overclock Tuner > Auto
AI Tweaker > Turbo Ratio > Auto
AI Tweaker > Internal PLL Overvoltage > Auto
AI Tweaker > Memory Frequency > Auto
AI Tweaker > EPU Power Saving Mode > Disabled
AI Tweaker > CPU Power Management > CPU Ratio > Auto
AI Tweaker > CPU Power Management > Enhanced Intel Speedstep Technology > Enabled
AI Tweaker > CPU Power Management > Turbo Mode > Enabled
Advanced Settings > CPU Configuration > Active Processor Cores > All
Advanced Settings > CPU Configuration > Limit CPUID Maximum > Disabled
Advanced Settings > CPU Configuration > Execute Disable Bit > Enabled
Advanced Settings > CPU Configuration > Enhanced Intel Speedstep Technology > Enabled
Advanced Settings > CPU Configuration > Turbo Mode > Enabled
Advanced Settings > CPU Configuration > CPU C1E > Auto
Advanced Settings > CPU Configuration > CPU C3 Report > Auto
Advanced Settings > CPU Configuration > CPU C6 Report > Auto
Advanced Settings > CPU Configuration > Intel Virtualization Technology > Enabled
Advanced Settings > PCH Configuration > High Precision Timer > Enabled
Advanced Settings > SATA Configuration > SATA Mode Selection > AHCI
Advanced Settings > SATA Configuration > S.M.A.R.T. Status Check > Enabled
Advanced Settings > System Agent Configuration > Memory Remap Feature > Enabled
Advanced Settings > System Agent Configuration > Graphics Configuration > Primary Display > Auto
Advanced Settings > System Agent Configuration > Graphics Configuration > iGPU Memory > 64M
Advanced Settings > System Agent Configuration > Graphics Configuration > Render Standby > Disabled
Advanced Settings > System Agent Configuration > Graphics Configuration > iGPU Multi-monitor > Disabled
Advanced Settings > CPU Configurations > VT-d > Disabled
Advanced Settings > USB Configuration > Legacy Support > Auto
Advanced Settings > USB Configuration > Legacy USB 3.0 Support > Enabled
Advanced Settings > USB Configuration > EHCI Hand-off > Disabled
Advanced Settings > Onboard Devices Configuration > HD Audio Controller > Enabled
Advanced Settings > Onboard Devices Configuration > Front Panel Type > HD
Advanced Settings > Onboard Devices Configuration > SPDIF Out Type > SPDIF
Advanced Settings > Onboard Devices Configuration > Bluetooth Controller > Enabled
Advanced Settings > Onboard Devices Configuration > VIA 1394 Controller > Enabled
Advanced Settings > Onboard Devices Configuration > PCI Express X16_3 slot (black) bandwidth > Auto
Advanced Settings > Onboard Devices Configuration > Marvell Storage Controller > AHCI Mode
Advanced Settings > Onboard Devices Configuration > Marvell Storage OPROM > Disabled
Advanced Settings > Onboard Devices Configuration > JMB Storage Controller > Enabled
Advanced Settings > Onboard Devices Configuration > JMB Storage OPROM > Enabled
Advanced Settings > Onboard Devices Configuration > Display OptionRom in POST > Enabled
Advanced Settings > Onboard Devices Configuration > Asmedia USB 3.0 Controller > Enabled
Advanced Settings > Onboard Devices Configuration > Asmedia USB 3.0 Battery Charging Support > Disabled
Advanced Settings > Onboard Devices Configuration > Intel LAN Controller > Enabled
Advanced Settings > Onboard Devices Configuration > Intel PXE OPROM > Disabled
Advanced Settings > APM > Restore AC Power Loss > Power Off
Advanced Settings > APM > Power On By PCI > Disabled
Advanced Settings > APM > Power On By PCIE > Disabled
Advanced Settings > APM > Power On By RTC > Disabled
Monitor > CPU Q-Fan Control > Enabled
Monitor > Chassis Q-Fan Control > Enabled
Boot > PCI ROM Priority > Legacy ROM
Boot > Option ROM Messages > Force BIOS
Boot > Setup Mode > Advanced Mode
Boot > Boot Option #1 > Clover Boot
Boot > Boot Option #2 > USB
Ek olarak paylaştığım Config dosyasını kullan.
 

Ekli dosyalar

BootLoader
OpenCore 0.6.4
Anakart Modeli
Asus Z170 Deluxe
İşlemci Modeli
Intel i7 6700K
Grafik Kartı
8 GB Sapphire RX 580 & HD 530
Ses Kartı Modeli
ALC 1150
Ağ Aygıtları
Broadcom BCM43xx - I211 Gigabit Ethernet
Disk ve RAM
500GB NVMe & 32 GB DDR4

ghostrider07

APPRENTICE
8 Kas 2019
12
0
1
hiçbiri işe yaramadi arkadaşlar catalina denedim onuda yukleyemiyor paylaşilan bios ayarlari zaten default degerler
 

montezuma

MASTER YODA
Yönetici
19 Eki 2016
29,833
7,598
4,401
Eski sürümler ile deneme yapabilirsin. Sierra ya da High Sierra gibi.
 
BootLoader
OpenCore 0.6.4
Anakart Modeli
Asus Z170 Deluxe
İşlemci Modeli
Intel i7 6700K
Grafik Kartı
8 GB Sapphire RX 580 & HD 530
Ses Kartı Modeli
ALC 1150
Ağ Aygıtları
Broadcom BCM43xx - I211 Gigabit Ethernet
Disk ve RAM
500GB NVMe & 32 GB DDR4

ghostrider07

APPRENTICE
8 Kas 2019
12
0
1
merhaba

catalina kurabildim baska sorunlar var ama onlar icin ayrı konu acacagim

bu sorunla karşilaşan olursa ilerde

dst patchlerden ehc1 to eh0 olani devre dişi biraksin

grafik ayarlarinda da inject ati seçili olacak birde deinit fake id 0x1245678 girilmeli
 
✖
AD Engelleyici Tespit Edildi

Anlıyoruz, reklamlar can sıkıcı!

Elbette, reklam engelleme yazılımı reklamları engelleme konusunda harika bir iş çıkarsa da, web sitemizin faydalı özelliklerini de engeller. En iyi site deneyimi ve bize destek olmak için lütfen AdBlocker’ınızı devre dışı bırakın.

AD Reklam Engelleyiciyi Devre Dışı Bıraktım    Hayır teşekkürler